
Step Nine: Retopology / Optimizing the model
All right, now that I’m happy with my high poly mesh it’s time to convert into a low poly model, so where do I start? Well I have a few options available to me in this task and I’ll make sure to give a brief overview of each of them. Up until this point I’ve tried to stay software neutral but looks as though I have to get a bit specific in terms of the functions and workflow. From here on I’ll be going over a few features in both Zbrush 3.1 and 3ds max with Polyboost. So let’s start with option number one.
ZBrush 3.1 retopology workflow:
ZBrush as we know has a cool set of tools and one of them happens to be its ability to build new topology over an imported mesh. The quick start guide below pretty much shows how I get up and running when it comes to building new topology in ZBrush. Before I begin there's a few things that you need to know when you’re first just starting out:
- When creating your low poly mesh you can deselect by clicking on the canvas, and when you want to select vertices just click on it.
- To delete a vertex hit “alt” and click on the vertices you want to get rid of.
- To create new edges just click on it, “preferably” in the center of the edge”.
- Make sure to hit “A” regularly preview what your retopologized model will look like.
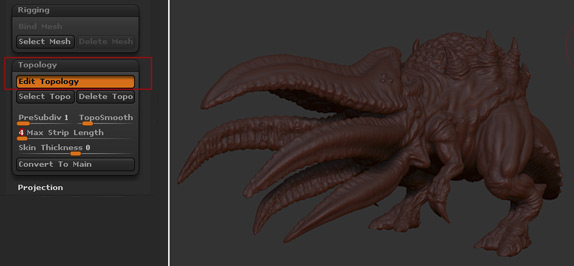
- If you would like to have open holes in your retopologized mesh then set the “Max Strip length to 3 or 4.
- Go into move mode if you would like to move the vertices you created around. The “Move” button is right next to the “Draw and Edit” buttons.
Once you’re done editing those vertices you can switch back to draw mode.
1. The first thing you have to do is to import the Mesh into ZBrush as a tool.
2. Once the mesh is loaded select a zsphere and draw it on the canvas, after that press the edit button.
3. Then in the rigging tab, select the model that you want to retopologize. When that happens the tool momentarily shares the same space as the ZSphere.
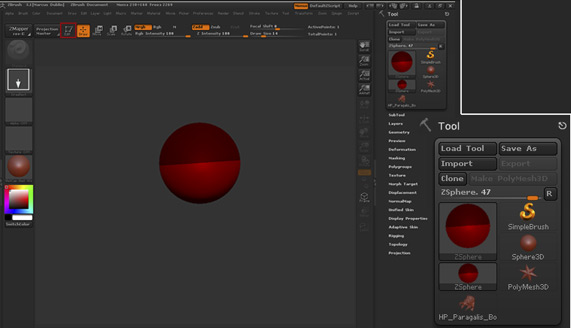
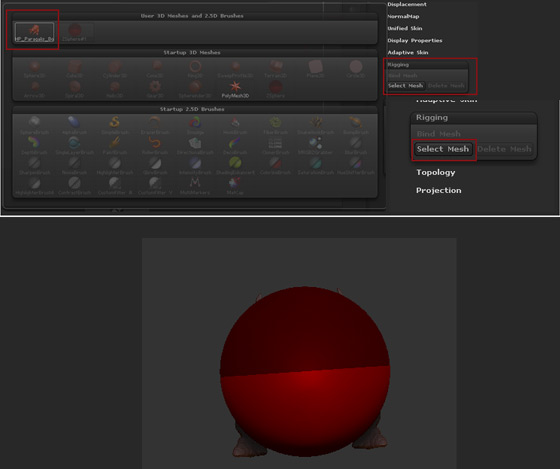
4. After that click on the topology tab and Hit "Edit Topology". The mesh is the only thing on the canvas at this point and it turns brick red.
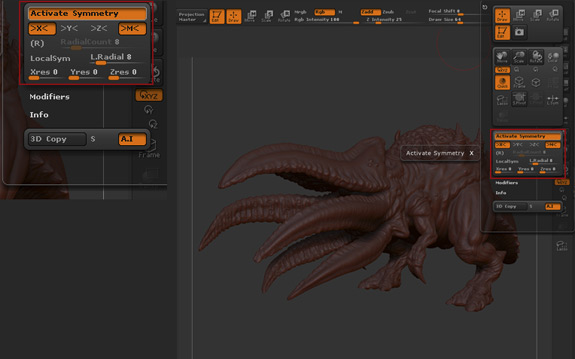
5. Then go into the Transform palette and turn on symmetry
6. When that’s done click on the model to start adding new topology lines while creating and connecting vertices along the way.
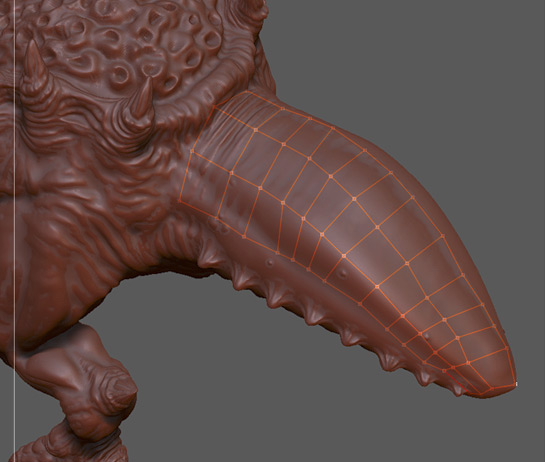
At this point I start to create the vertices that connects the topology lines. You can see from the image below how this works. I started with the head and made my way down the back by simply roughing out the shape. I try not to worry about edge flow and tight detail in the early going; I simply concentrate on all of the big forms. I then begin to tweak the vertices and edges for better edge flow once I have the new topology conformed to the mesh. You should always keep in mind that the new topology would be used for a low poly model, so try not to concern yourself with a perfect shrink-wrap! All you need is enough new geometry that you can modify in your 3d application. Another cool thing about Zbrush is Adaptive Skin, you can pretty much cycle through higher and lower subdivision levels by adjusting the slider. What this means is that you can comfortably build your new mesh at a higher subdivision level and reduce it on the fly when you’re ready. When the mesh is completed I simply hit the “A” button to look over my mesh, then I go to the tool palette and export the new geometry.
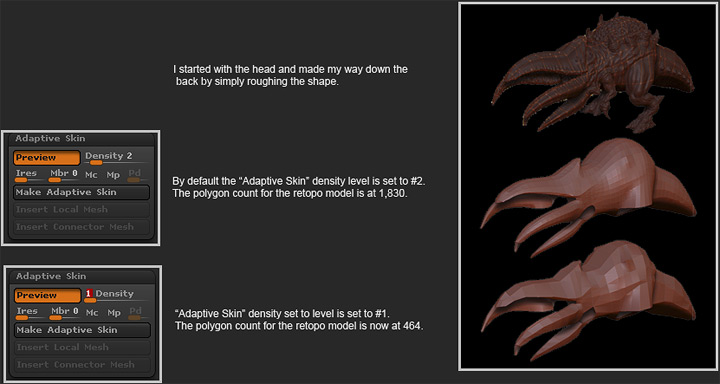
Well that’s it from the Zbrush side of things, I could have continued building out the new mesh by repeating most of the steps mentioned above. Instead I’m going to move into the 3ds max / Polyboost workflow and demonstrate a few of the tools features.
I
I
I
I
I
I
I
I
I
I