
3ds Max / Polyboost retopology Workflow
Before going over this method I wanted to talk a bit about Polyboost. Polyboost is a max script that features a number of handy tools for modeling, texturing, UV mapping, transforming, selecting, etc. Unfortunately it’s not a free max script but I will tell you that I find it extremely valuable and have incorporated it into my workflow. That being said I highly recommend this to artists who want to get a little more mileage out of 3ds max! By the way you can view some of the additional Polyboost features on www.polyboost.com
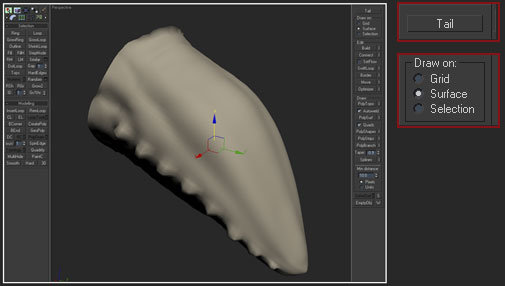
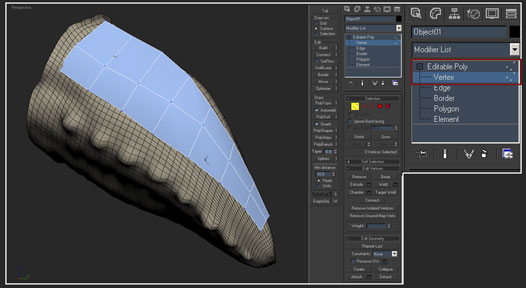
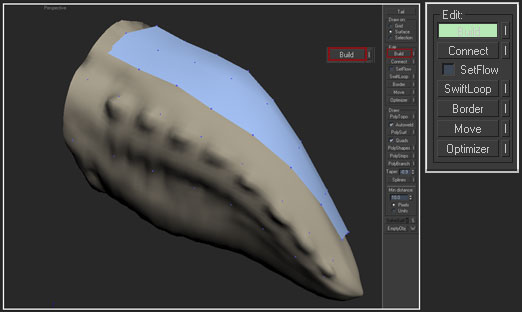
This is a brief overview on how I get started rebuilding topology in 3dsmax, which in turn will feel a bit like the Zbrush 3.1 workflow. Only now I’ll be working with a much lower triangle count source mesh. Once I was happy with the original high poly mesh I then proceeded to go down a few sub division levels and export it at a level 3ds max can handle. The midlevel mesh that was exported came in at 66,048 triangles. The cool thing is that the midlevel source mesh carries all of the silhouette detail needed for me to start building around. That being said you can see from the image below how the selected tools in Polyboost work. The main tool that I’ll be using is “PolyDraw”. Under PolyDraw are a number of sub tools that I’ll be using as well, mainly the “PolyTopo” brush and the “Build” tool. I selected the tale and hide the rest of the mesh so that you can see how the tools work.. Here are the steps involved:
1. I make sure to set my "Drawn on" to surface mode. The "Surface" mode allows me to select an object with the "Pick" button so that I can draw on the surface of that object.
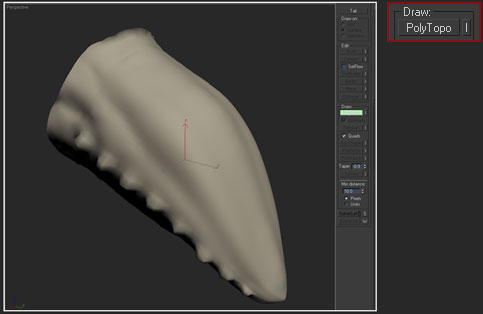
2. Next, I click on "PolyTopo". Polytopo is a topology brush that draws surface lines across your selected mesh. The Tool has a free form feel to it unlike ZBrush's which tends to create a set of ridged interconnecting vertices.
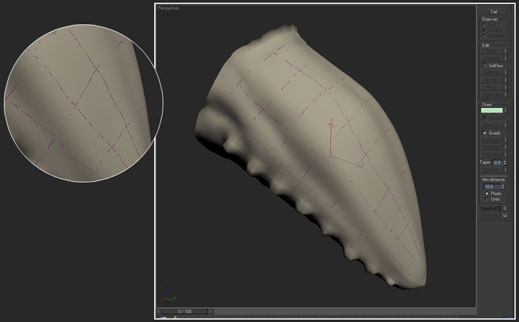
3. At this point I start drawing on my mesh. I like to make sure to only draw on the surface area I can view comfortably, much like ZBrush Polyboost has a hard time figuring out certain angles.
4. When I want to view the mesh I just "Right Click", this deactivates the Polyboost tool set.
5. Then I continue retopologizing my new mesh around the tail by selecting the retopo mesh and going into vertex mode.
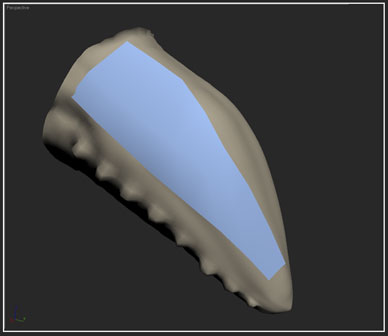
6. Then under "Edit" I select "Build" and start adding additional vertices. The vertices will automatically conform to mesh surface.
7. Now it's time for me to connect the vertices to make new faces. I do so by Holding "Shift + Drag", this will automatically create faces in between the vertices filling in the gaps.
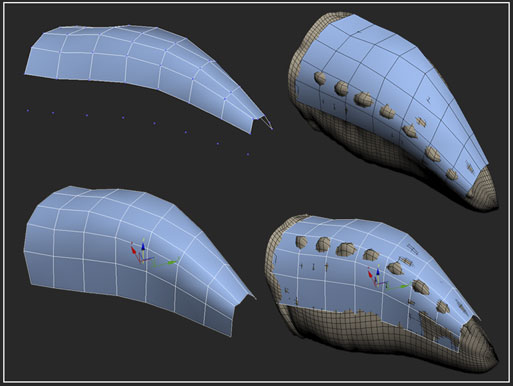
And that's it, I simply rinse and repeat the process until the entire mesh is retopologized.
Modeling Application / Retopology workflow
So let’s say you don’t have access to Zbrush 3.1 or cool tools like Polyboost, what do you do? Well in this case you’ll have to shift your workflow to sheer brute force optimizations. This was a workflow that I often used before I got a hold of Zbrush and Polyboost, and to be honest I still use it every now and then. You simply have to export a subdivision level that conforms to the high poly silhouette and begin stripping away edges and faces. I know a number of artists who actually prefer this method and have become very proficient at it. This method takes quite a bit of patience and a mastery of your modeling tools.
There are a number of different tools like “Topogun, Blender, Nex, etc. that also do a good job of building new topology over your source mesh. I guess you’ll have to find out what works best for you and run with it!
Paragalis / Retopology / Optimizing the model:
Defining edge loops:
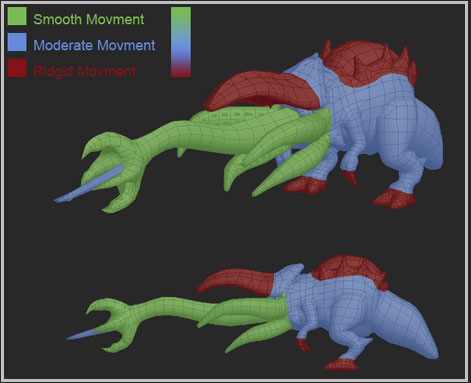
So now that my mesh is almost done I want to highlight areas within the model that require most of the edge loops for posing and animation purposes. Now “I am not an animator” but I’ve worked with enough of them to know what they like and what they don’t. Looking at the image below you can see the areas that required the most edge loops for smoother movement. The tongue, lower tentacles, shoulders, knees, and ankles get an additional loop, or in the tongues case a bunch of them! Since this is a personal project I’m pretty much guessing on what areas require what based on past creature work experience. I would have consulted with the animator to see what I could “get away” with in the modeling stage had this model actually been created for a production. That being said I’m pretty happy with the mesh as it is and will now move on to matching up the mid level poly and low poly meshes.
I
I
I
I
I
I
I
I
I
I